渲染模块
1、渲染模块
案例位置:examples/Cuda/QtGUI/Qt_GLVisualModule
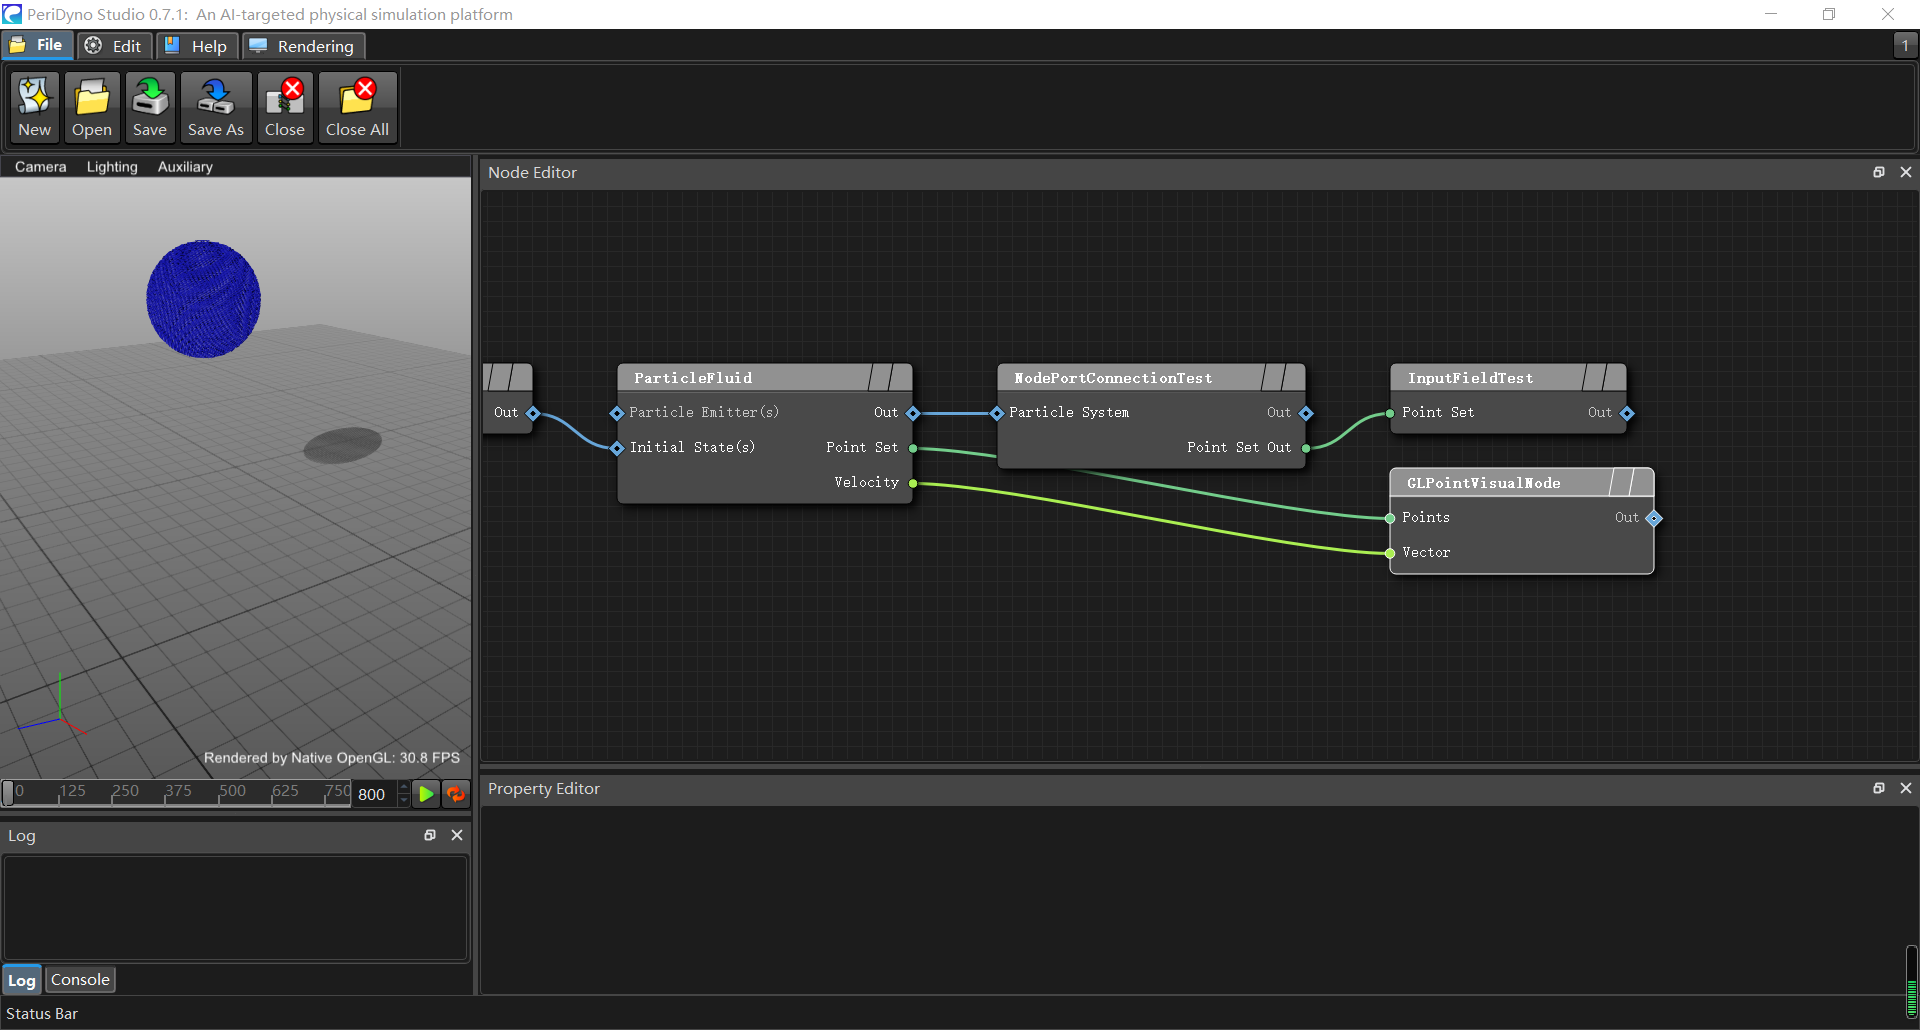
功能介绍:该案例展示了Qt框架下 GLPointVisualModule 类的的基本使用。渲染模块是渲染节点的一部分,在渲染模块中可以对渲染节点的属性进行修改,同时通过场景图更换其他的渲染模块。
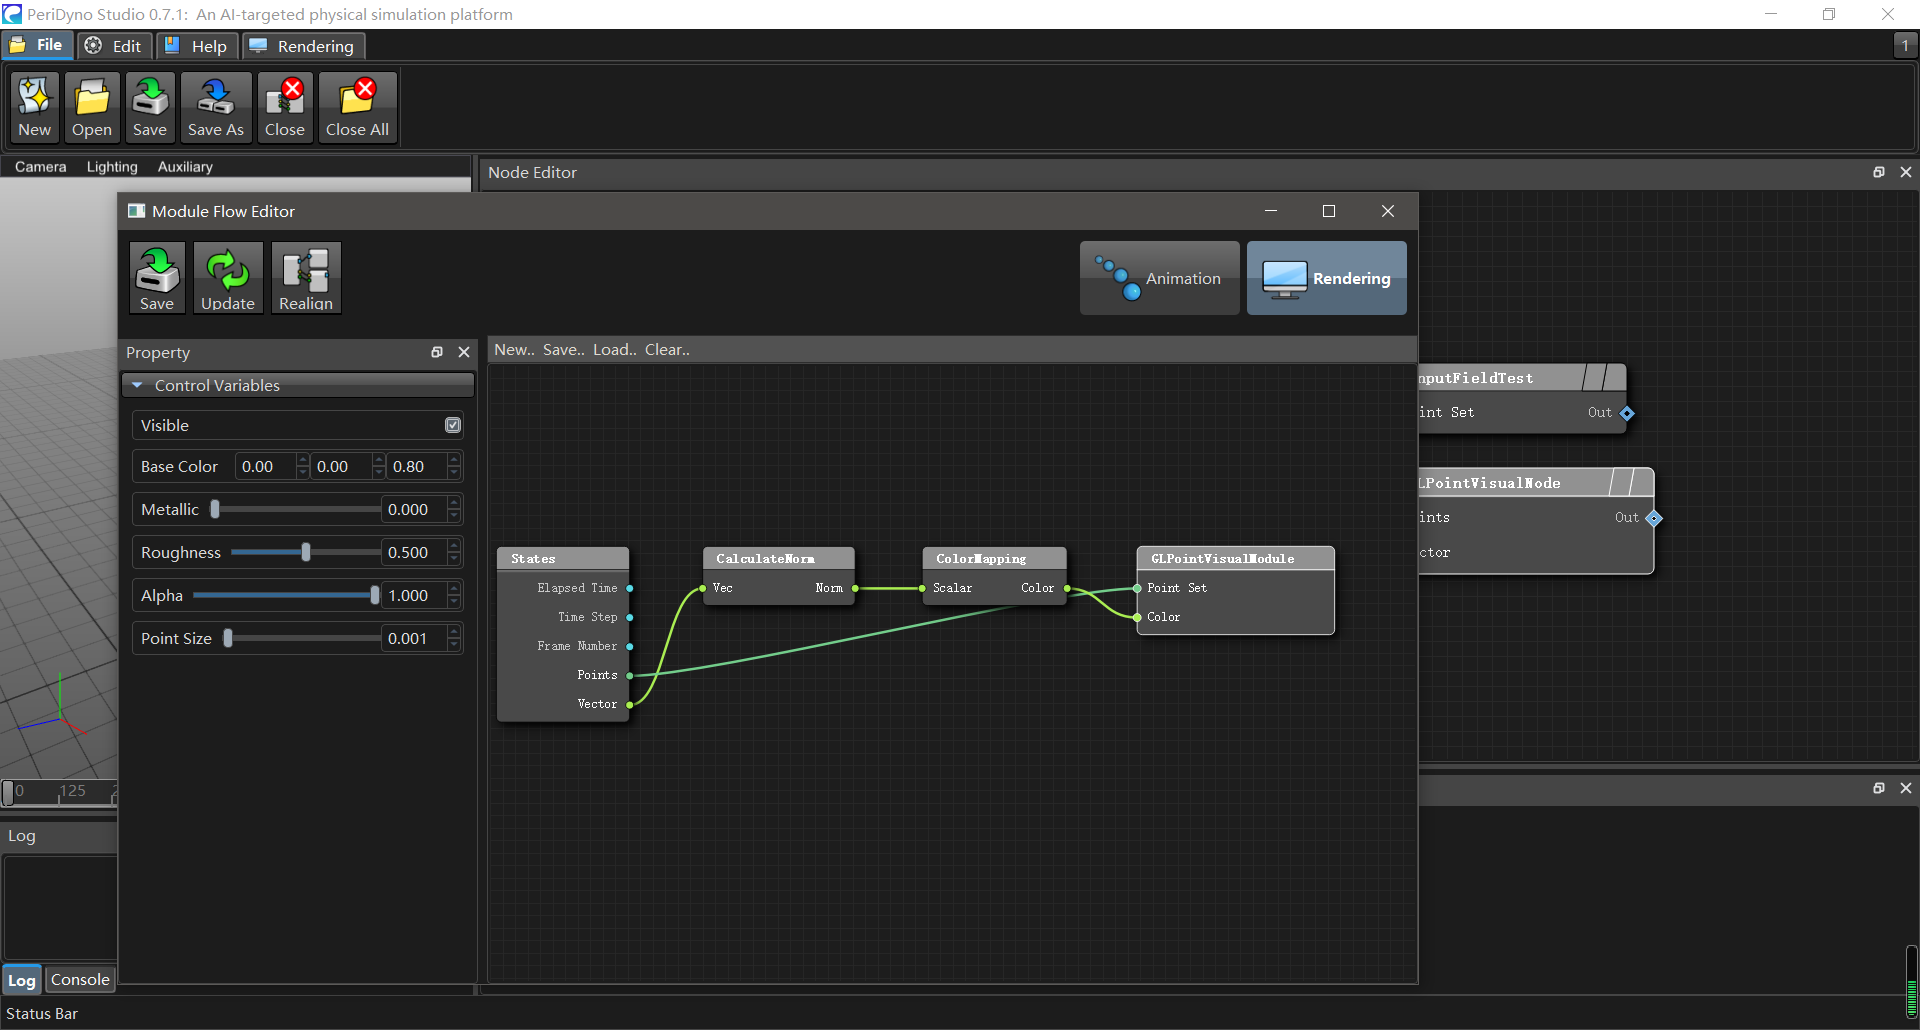
案例说明:案例渲染了一个球体形状的流体粒子群。粒子群在重力的作用下向下掉落。随着掉落速度的增加,粒子的颜色随之发生改变。案例中点击GLPointVisualNode节点可对该节点中的渲染模块进行修改,例如粒子颜色、粒子大小等。
-
渲染节点:
-
渲染模块:
2、程序实现
接下来介绍案例的实现过程:
- 创建场景图及边界:
	std::shared_ptr<SceneGraph> scn = std::make_shared<SceneGraph>();
	scn->setUpperBound(Vec3f(1.5, 1, 1.5));
	scn->setLowerBound(Vec3f(-0.5, 0, -0.5));
- 创建球体模型,并将其转为流体粒子:
	//Create a sphere
	auto sphere = scn->addNode(std::make_shared<SphereModel<DataType3f>>());
	sphere->varLocation()->setValue(Vec3f(0.6, 0.85, 0.5));
	sphere->varRadius()->setValue(0.1f);
	sphere->graphicsPipeline()->disable();

	//Create a sampler
	auto sampler = scn->addNode(std::make_shared<SphereSampler<DataType3f>>());
	sampler->varSamplingDistance()->setValue(0.005);
	sampler->graphicsPipeline()->disable();

	sphere->outSphere()->connect(sampler->inSphere());

    auto initialParticles = scn->addNode(std::make_shared<MakeParticleSystem<DataType3f>>());

	sampler->statePointSet()->promoteOuput()->connect(initialParticles->inPoints());

	auto fluid = scn->addNode(std::make_shared<ParticleFluid<DataType3f>>());
	//fluid->loadParticles(Vec3f(0.5, 0.2, 0.4), Vec3f(0.7, 1.5, 0.6), 0.005);
	initialParticles->connect(fluid->importInitialStates());

	auto testNode = scn->addNode(std::make_shared<NodePortConnectionTest<DataType3f>>());
	fluid->connect(testNode->importParticleSystem());
- 创建渲染节点:
	auto ptVisulizer = scn->addNode(std::make_shared<GLPointVisualNode<DataType3f>>());

	auto outTop = fluid->statePointSet()->promoteOuput();
	auto outVel = fluid->stateVelocity()->promoteOuput();
	outTop->connect(ptVisulizer->inPoints());
	outVel->connect(ptVisulizer->inVector());

	auto nullNode = scn->addNode(std::make_shared<InputFieldTest<DataType3f>>());
	testNode->outPointSetOut()->connect(nullNode->inPointSet());