Linux平台安装
1、平台
- Linux 平台:推荐ubuntu:20.04.4-LTS-desktop
- 不推荐虚拟机安装:虚拟机中的显卡不是真实的物理显卡,在CUDA安装及后续的项目编译中会出现问题。
ubuntu:20.04-LTS-desktop版本系统与本项目运行环境契合度较高,项目编译起来问题较少。ubuntu:18.04-LTS-desktop版本OpenGL版本低于4.3,而且升级较为麻烦。ubuntu22.04-LTS-desktop版本系统g++、gcc以及cuda的版本较高,需要修改gcc和g++的版本。笔者选用ubuntu:22.04-LTS-desktop版本系统作为运行环境,其他版本的Linux系统,读者可以自行尝试。
2、依赖
- OpenGL version:4.6+
$ glxinfo | grep "OpenGL version"
OpenGL version string: 4.6.0 NVIDIA 510.47.03
- 安装mesa-utils:
$ sudo apt install mesa-utils
查看驱动版本:
$ nvidia-smi
Fri Jul 11 16:30:01 2025
+-----------------------------------------------------------------------------------------+
| NVIDIA-SMI 572.61                 Driver Version: 572.61         CUDA Version: 12.8     |
|-----------------------------------------+------------------------+----------------------+
| GPU  Name                  Driver-Model | Bus-Id          Disp.A | Volatile Uncorr. ECC |
| Fan  Temp   Perf          Pwr:Usage/Cap |           Memory-Usage | GPU-Util  Compute M. |
|                                         |                        |               MIG M. |
|=========================================+========================+======================|
|   0  NVIDIA GeForce GTX 1080 Ti   WDDM  |   00000000:01:00.0  On |                  N/A |
| 37%   64C    P0             60W /  250W |    4599MiB /  11264MiB |      1%      Default |
|                                         |                        |                  N/A |
+-----------------------------------------+------------------------+----------------------+

+-----------------------------------------------------------------------------------------+
调用nvidia-smi指令时有可能会出现找不到的问题,其原因通常是Ubuntu 22.04没有安装最新显卡驱动。较为简单的方法可以通过Software & Updates –>Additional Drivers选取合适的显卡驱动重新安装,安装之后重启系统。
- CUDA Version: 11+:
$ nvcc --version
nvcc: NVIDIA (R) Cuda compiler driver
Copyright (c) 2005-2024 NVIDIA Corporation
Built on Fri_Jun_14_16:44:19_Pacific_Daylight_Time_2024
Cuda compilation tools, release 12.6, V12.6.20
Build cuda_12.6.r12.6/compiler.34431801_0
CUDA安装参见官网,安装成功后需要配置环境变量,打开.bashrc文件:
$ sudo vim ~/.bashrc
在文件结尾添加:
export PATH=/usr/local/cuda-12.6/bin:$PATH
export LD_LIBRARY_PATH=/usr/local/cuda-12.6/lib64:$LD_LIBRARY_PATH
激活配置文件:
source ~/.bashrc
- cmake version: 3.10+
安装CMake:
$ sudo apt install cmake
查看cmake版本:
$ cmake --version
cmake version 3.31.6
CMake suite maintained and supported by Kitware (kitware.com/cmake).
同时推荐安装cmake-gui。PeriDyno项目编译可选参数较多,使用图形化界面可以便捷的选择需要编译的库。
下面也会介绍通过命令行的方式对cmake开启可选参数进行编译的办法。
值得注意的是,默认安装的cmake版本较低,有可能出现与最新版本CUDA不兼容的情况。如果出现 “The CMAKE_CUDA_COMPILER: /usr/local/ is not a full path to an existing compiler tool ”的错误,请安装高版本cmake。安装方式如下:
$ sudo apt remove cmake
$ sudo apt autoremove
$ sudo snap install cmake --classic
3、安装项目
(1)更新系统软件环境:
$ sudo apt-get update
(2)安装C++编译器:
$ sudo apt install g++
$ sudo apt install gcc
查看gcc和g++版本是否和cuda对应,CUDA 版本和 GCC/Clang 版本兼容性可以在 cuda/include/crt/host_config.h 文件里找到。
$ gcc --version
$ g++ --version
安装对应版本的gcc和g++,使用update-alternatives修改版本。
$ apt install gcc-12 g++-12
$ sudo update-alternatives --install /usr/bin/gcc gcc /usr/bin/gcc-12 120
$ sudo update-alternatives --install /usr/bin/g++ g++ /usr/bin/g++-12 120
(3)安装依赖包:
$ sudo apt-get install libx11-dev libxext-dev libxrender-dev libxtst-dev libxt-dev libxrandr-dev libxinerama-dev libxcursor-dev
$ sudo apt install -y mesa-common-dev  libgl-dev pkg-config
(4)克隆项目及子模块:
$ git clone -b linux --recursive https://gitee.com/peridyno/peridyno.git
(5)创建build文件夹:
$ mkdir build
$ cd build
4、编译项目
- cmake项目,其中参数 -D PERIDYNO_EXMAPLE=ON 表示编译PeriDyno中的exmaple工程:
$ cmake -D PERIDYNO_EXMAPLE=ON ..
-- The CUDA compiler identification is NVIDIA 12.1.105
-- The CXX compiler identification is GNU 12.3.0
-- The C compiler identification is GNU 12.3.0
-- Detecting CUDA compiler ABI info
-- Detecting CUDA compiler ABI info - done
-- Check for working CUDA compiler: /usr/local/cuda/bin/nvcc - skipped
-- Detecting CUDA compile features
-- Detecting CUDA compile features - done
-- Detecting CXX compiler ABI info
-- Detecting CXX compiler ABI info - done
-- Check for working CXX compiler: /usr/bin/c++ - skipped
-- Detecting CXX compile features
-- Detecting CXX compile features - done
-- Detecting C compiler ABI info
-- Detecting C compiler ABI info - done
-- Check for working C compiler: /usr/bin/cc - skipped
-- Detecting C compile features
-- Detecting C compile features - done
-- Performing Test CMAKE_HAVE_LIBC_PTHREAD
-- Performing Test CMAKE_HAVE_LIBC_PTHREAD - Success
-- Found Threads: TRUE
-- Found CUDA: /usr/local/cuda (found version "12.1")
-- Could NOT find Doxygen (missing: DOXYGEN_EXECUTABLE)
-- Using X11 for window creation
-- Found X11: /usr/include
-- Looking for XOpenDisplay in /usr/lib/x86_64-linux-gnu/libX11.so;/usr/lib/x86_64-linux-gnu/libXext.so
-- Looking for XOpenDisplay in /usr/lib/x86_64-linux-gnu/libX11.so;/usr/lib/x86_64-linux-gnu/libXext.so - found
-- Looking for gethostbyname
-- Looking for gethostbyname - found
-- Looking for connect
-- Looking for connect - found
-- Looking for remove
-- Looking for remove - found
-- Looking for shmat
-- Looking for shmat - found
-- Looking for IceConnectionNumber in ICE
-- Looking for IceConnectionNumber in ICE - found
-- Configuring done (14.6s)
-- Generating done (1.5s)
-- Build files have been written to: /public/home/acpagbrbsr/Software/peridyno/build
- 如果安装了cmake-gui图形界面:
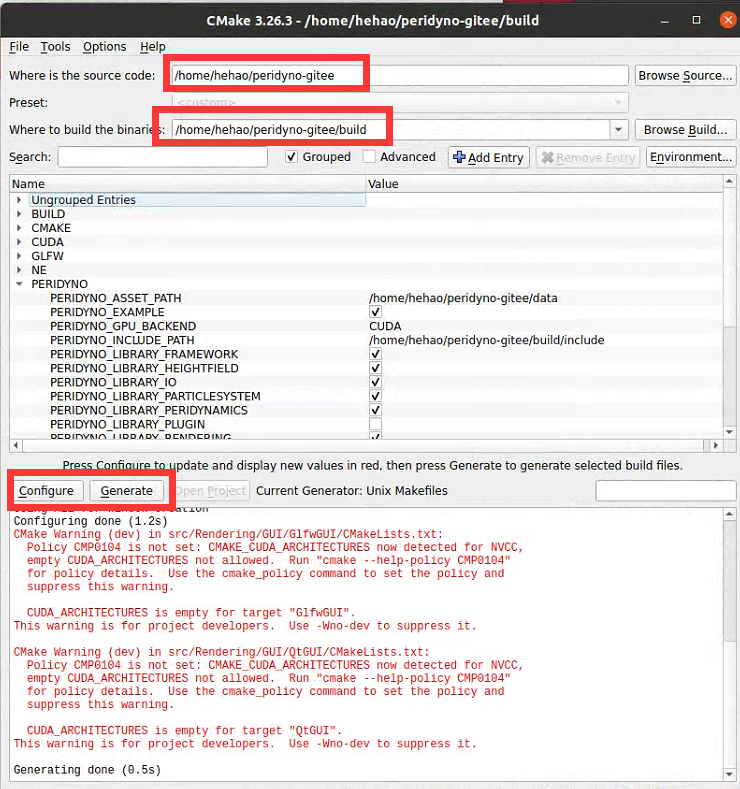
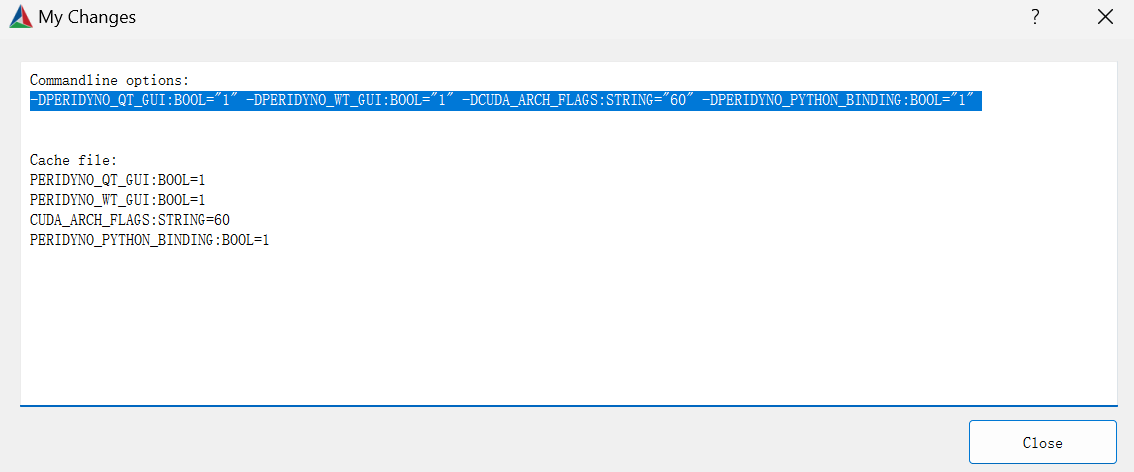
camke的可选参数可以通过cmake-gui->Tools->Show My Changes查看。
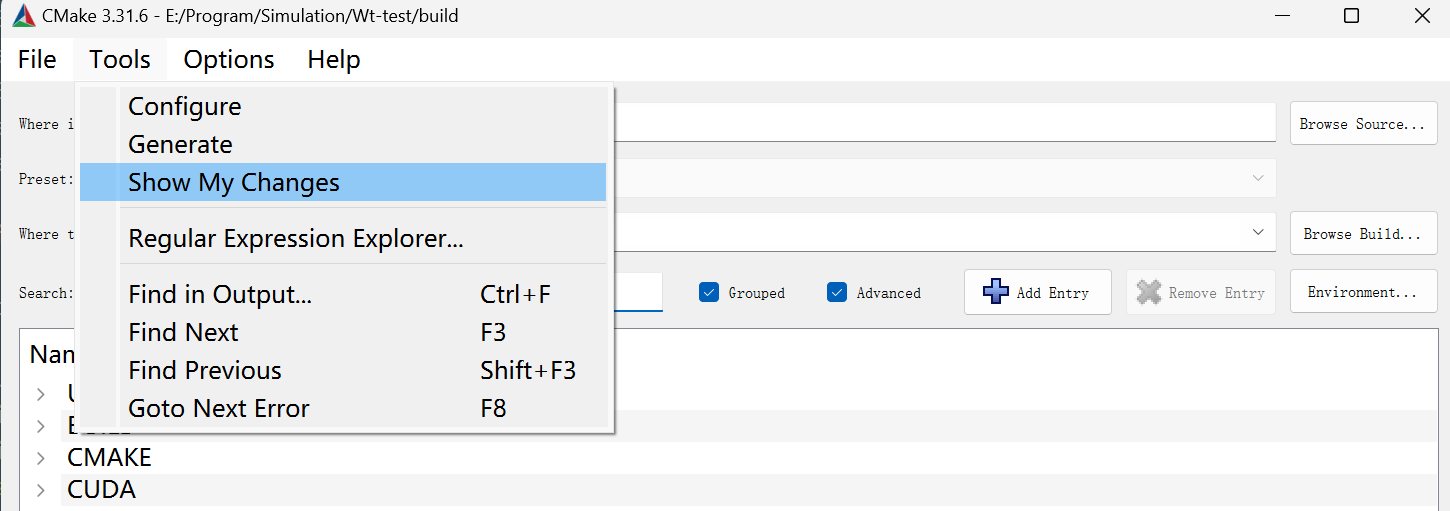 显示的是在cmake-gui中修改的参数,可以直接用在cmake命令行中。
- build项目
可以使用make或ninja对项目进行编译。
可以使用 make -j8 指令加快编译速度,其中 -j8 表示使用8个线程同时编译。
可以使用ccache对编译结果进行缓存,减少出现错误后重复构建的时间。cmake参数需要加上 -DCMAKE_CXX_COMPILER_LAUNCHER=ccache 生效。
推荐使用ninja进行编译,并行处理速度较快,但会占满CPU。cmake参数需要加上 -G Ninja 生效。
hehao@hehao:~/peridyno-gitee/build$ make
[  2%] Built target Imath
[  6%] Built target glfw
[  7%] Built target glad
[  9%] Built target imgui
[ 12%] Built target Core
[ 38%] Built target Alembic
[ 58%] Built target Framework
[ 60%] Built target RenderCore
[ 60%] Built target ABCExporter
[ 62%] Built target ImWidgets
[ 65%] Built target IO
Scanning dependencies of target GLRenderEngine
[ 67%] Built target Volume
[ 69%] Built target HeightField
[ 70%] Built target RigidBody
[ 75%] Built target ParticleSystem
[ 75%] Building CXX object src/Rendering/Engine/OpenGL/CMakeFiles/GLRenderEngine.dir/gl/Program.cpp.o
[ 79%] Built target Peridynamics
[ 79%] Linking CUDA device code CMakeFiles/GLRenderEngine.dir/cmake_device_link.o
[ 79%] Linking CXX static library ../../../../lib/Release/libGLRenderEngine.a
[ 85%] Built target GLRenderEngine
[ 86%] Linking CUDA device code CMakeFiles/GlfwGUI.dir/cmake_device_link.o
[ 86%] Linking CXX shared library ../../../../lib/Release/libdynoGlfwGUI-0.6.0.so
[ 86%] Built target GlfwGUI
[ 86%] Linking CUDA device code CMakeFiles/GL_GlfwGUI.dir/cmake_device_link.o
[ 86%] Linking CUDA device code CMakeFiles/GL_Bricks.dir/cmake_device_link.o
[ 87%] Linking CUDA device code CMakeFiles/GL_Buoyancy.dir/cmake_device_link.o
[ 87%] Linking CUDA device code CMakeFiles/GL_InstanceVisualizer.dir/cmake_device_link.o
[ 88%] Linking CUDA device code CMakeFiles/GL_CapillaryWave.dir/cmake_device_link.o
[ 88%] Linking CUDA device code CMakeFiles/GL_Cloth.dir/cmake_device_link.o
[ 88%] Linking CUDA device code CMakeFiles/GL_Elasticity.dir/cmake_device_link.o
[ 88%] Linking CUDA device code CMakeFiles/GL_CollisionMask.dir/cmake_device_link.o
[ 88%] Linking CXX executable ../../bin/Release/GL_GlfwGUI
[ 89%] Linking CXX executable ../../bin/Release/GL_Buoyancy
[ 89%] Linking CXX executable ../../bin/Release/GL_Bricks
[ 89%] Linking CXX executable ../../bin/Release/GL_Elasticity
[ 89%] Linking CXX executable ../../bin/Release/GL_CapillaryWave
[ 89%] Linking CXX executable ../../bin/Release/GL_CollisionMask
[ 89%] Linking CXX executable ../../bin/Release/GL_InstanceVisualizer
[ 89%] Linking CXX executable ../../bin/Release/GL_Cloth
[ 89%] Built target GL_GlfwGUI
[ 90%] Linking CUDA device code CMakeFiles/GL_Ocean.dir/cmake_device_link.o
[ 91%] Built target GL_CollisionMask
[ 91%] Built target GL_Elasticity
[ 91%] Built target GL_Cloth
[ 91%] Built target GL_Buoyancy
[ 92%] Built target GL_Bricks
[ 93%] Built target GL_InstanceVisualizer
[ 93%] Built target GL_CapillaryWave
[ 93%] Linking CUDA device code CMakeFiles/GL_OceanPatch.dir/cmake_device_link.o
[ 93%] Linking CUDA device code CMakeFiles/GL_ParticleEmitter.dir/cmake_device_link.o
[ 94%] Linking CUDA device code CMakeFiles/GL_ParticleFluid.dir/cmake_device_link.o
[ 94%] Linking CUDA device code CMakeFiles/GL_Plasticity.dir/cmake_device_link.o
[ 94%] Linking CUDA device code CMakeFiles/GL_Timing.dir/cmake_device_link.o
[ 94%] Linking CUDA device code CMakeFiles/GL_TwoTets.dir/cmake_device_link.o
[ 94%] Linking CXX executable ../../bin/Release/GL_Ocean
[ 94%] Linking CUDA device code CMakeFiles/GL_TwoBoxes.dir/cmake_device_link.o
[ 94%] Linking CXX executable ../../bin/Release/GL_ParticleFluid
[ 94%] Built target GL_Ocean
[ 96%] Linking CXX executable ../../bin/Release/GL_Timing
[ 96%] Linking CXX executable ../../bin/Release/GL_OceanPatch
[ 96%] Linking CXX executable ../../bin/Release/GL_Plasticity
[ 96%] Linking CXX executable ../../bin/Release/GL_ParticleEmitter
[ 96%] Linking CXX executable ../../bin/Release/GL_TwoTets
[ 97%] Linking CUDA device code CMakeFiles/GL_Wireframe.dir/cmake_device_link.o
[ 97%] Linking CXX executable ../../bin/Release/GL_TwoBoxes
[ 97%] Linking CXX executable ../../bin/Release/GL_Wireframe
[ 98%] Built target GL_ParticleFluid
[ 98%] Built target GL_OceanPatch
[ 98%] Linking CUDA device code CMakeFiles/GL_GhostSPH.dir/cmake_device_link.o
[ 98%] Built target GL_Timing
[ 99%] Built target GL_TwoTets
[ 99%] Built target GL_ParticleEmitter
[ 99%] Built target GL_Plasticity
[ 99%] Built target GL_TwoBoxes
[100%] Linking CXX executable ../../../bin/Release/GL_GhostSPH
[100%] Built target GL_Wireframe
[100%] Built target GL_GhostSPH
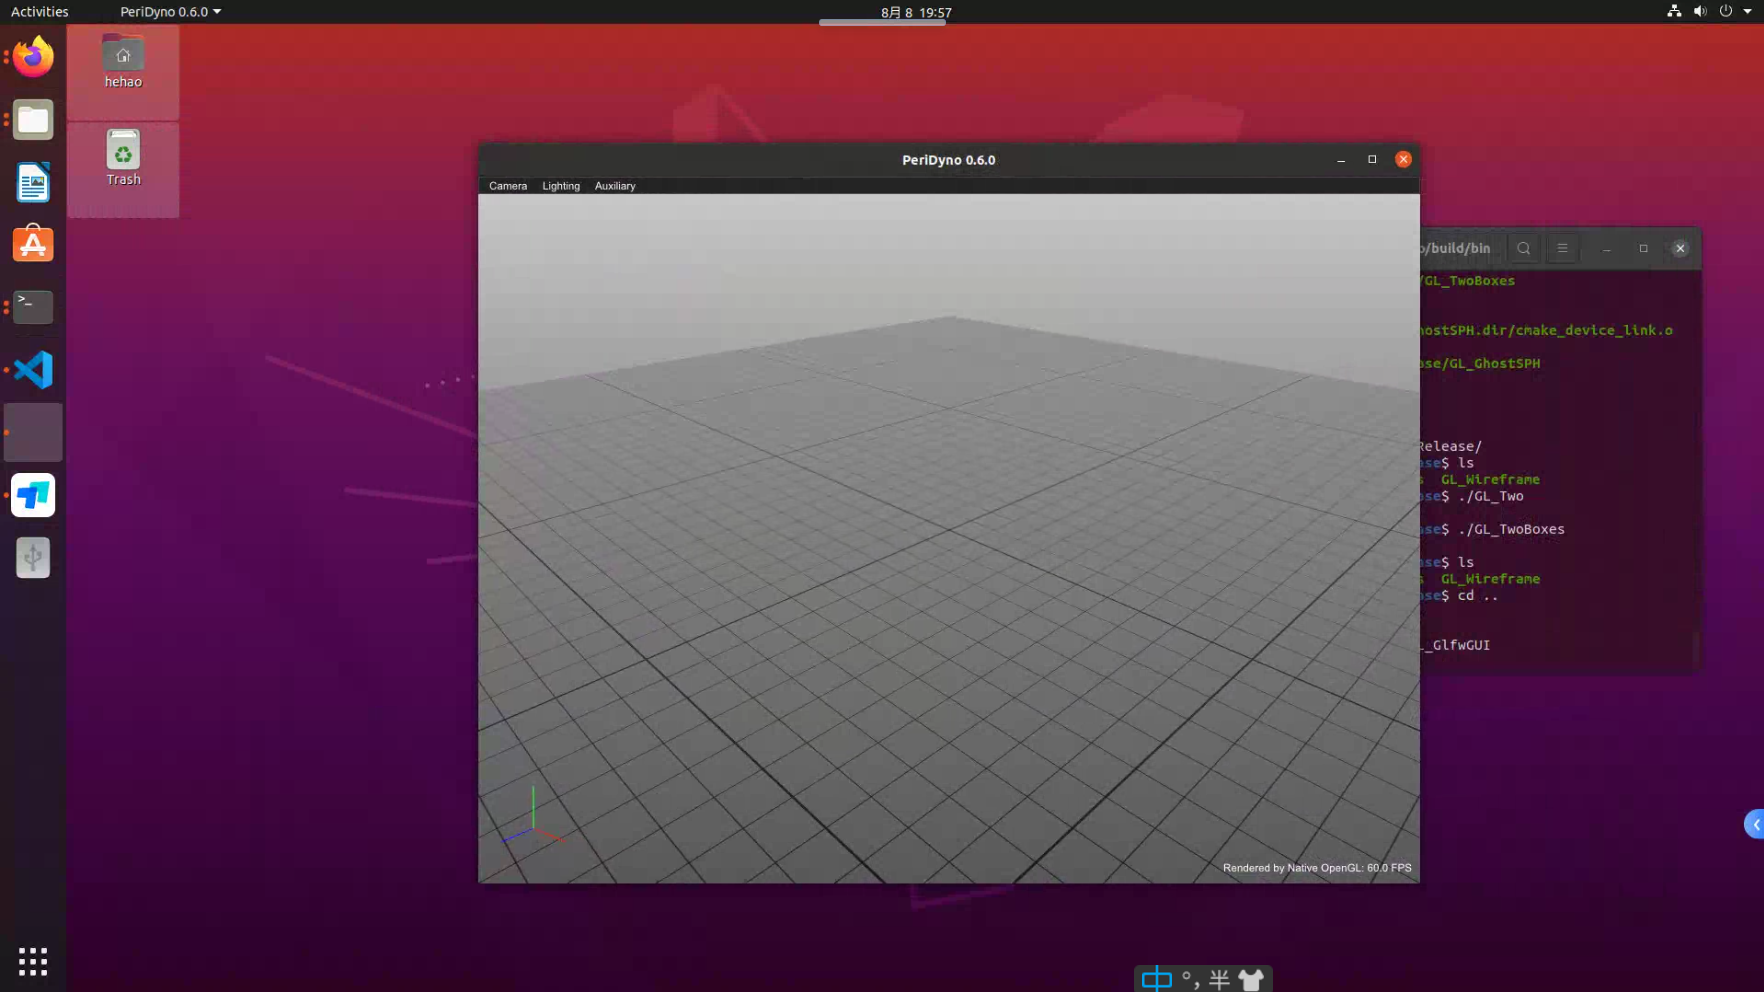
- 运行PeriDyno示例:
$ cd bin/Release
$ ./GL_GlfwGUI
- 运行效果如下:
5、安装Vulkan(可选)
git clone https://github.com/SaschaWillems/Vulkan.git
git submodule sync
git submodule update --init --recursive
mkdir build
cd build
cmake ..
make
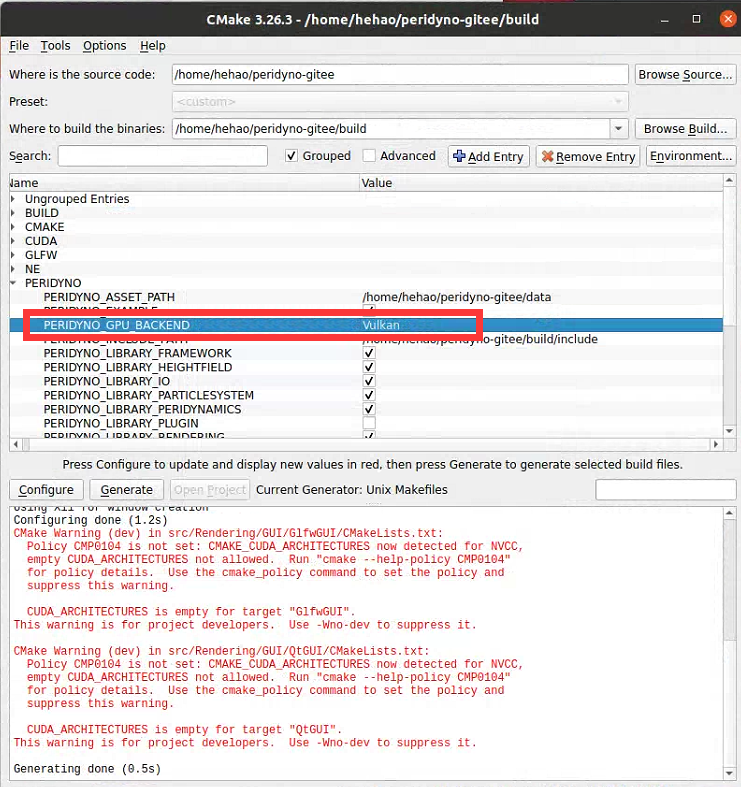
安装了Vulkan,可选择Vulkan模式进行编译:
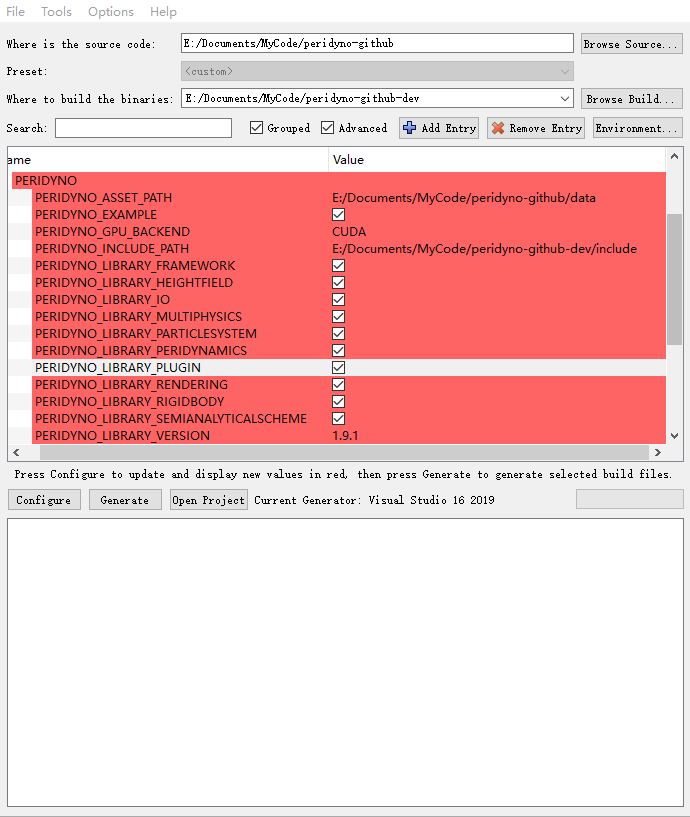
6、Peridyno插件安装(可选)
PeriDyno支持插件导入。在正常情况下,为了提高编译速度,默认插件是不启用的。如需要使用插件,在cmake阶段勾选PERIDYNO_LIBRARY_PLUGIN选项:
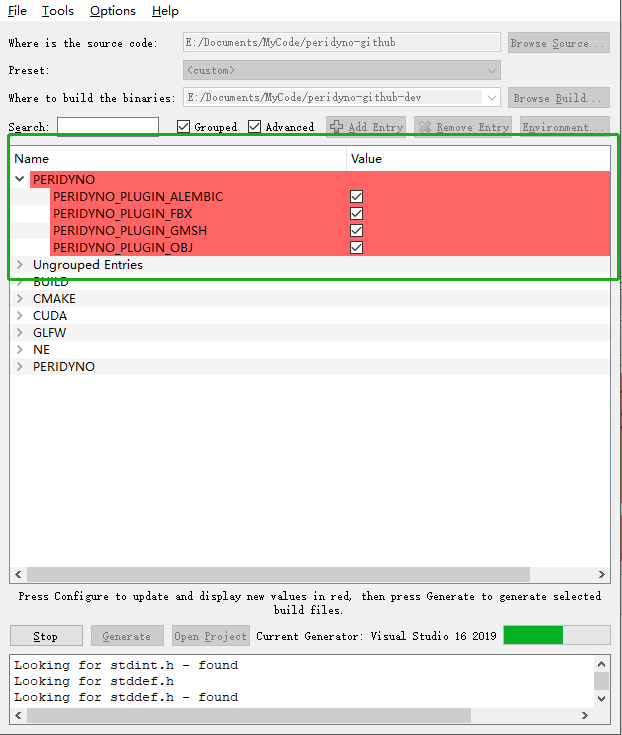
重新Configure和Generate后将会出现可选的插件:
7、安装交互式Qt框架(可选)
- 安装Qt组件:
sudo apt-get install build-essential

sudo apt-get install qtcreator

sudo apt-get install qt5-default

sudo apt-get install libqt5svg5*
- cmake项目,其中参数 -D PERIDYNO_Qt5_GUI=ON 表示编译PeriDyno的Qt库:
hehao@hehao:~/peridyno-gitee/build$ cmake -D PERIDYNO_Qt5_GUI=ON ..
-- The C compiler identification is GNU 9.4.0
-- The CXX compiler identification is GNU 9.4.0
-- The CUDA compiler identification is NVIDIA 11.6.55
-- Check for working C compiler: /usr/bin/cc
-- Check for working C compiler: /usr/bin/cc -- works
-- Detecting C compiler ABI info
-- Detecting C compiler ABI info - done
-- Detecting C compile features
-- Detecting C compile features - done
-- Check for working CXX compiler: /usr/bin/c++
-- Check for working CXX compiler: /usr/bin/c++ -- works
-- Detecting CXX compiler ABI info
-- Detecting CXX compiler ABI info - done
-- Detecting CXX compile features
-- Detecting CXX compile features - done
-- Check for working CUDA compiler: /usr/local/cuda-11.6/bin/nvcc
-- Check for working CUDA compiler: /usr/local/cuda-11.6/bin/nvcc -- works
-- Detecting CUDA compiler ABI info
-- Detecting CUDA compiler ABI info - done
-- Looking for pthread.h
-- Looking for pthread.h - found
-- Performing Test CMAKE_HAVE_LIBC_PTHREAD
-- Performing Test CMAKE_HAVE_LIBC_PTHREAD - Failed
-- Looking for pthread_create in pthreads
-- Looking for pthread_create in pthreads - not found
-- Looking for pthread_create in pthread
-- Looking for pthread_create in pthread - found
-- Found Threads: TRUE
-- Found CUDA: /usr/local/cuda-11.6 (found version "11.6")
-- Could NOT find Doxygen (missing: DOXYGEN_EXECUTABLE)
-- Using X11 for window creation
-- Found X11: /usr/include
-- Looking for XOpenDisplay in /usr/lib/x86_64-linux-gnu/libX11.so;/usr/lib/x86_64-linux-gnu/libXext.so
-- Looking for XOpenDisplay in /usr/lib/x86_64-linux-gnu/libX11.so;/usr/lib/x86_64-linux-gnu/libXext.so - found
-- Looking for gethostbyname
-- Looking for gethostbyname - found
-- Looking for connect
-- Looking for connect - found
-- Looking for remove
-- Looking for remove - found
-- Looking for shmat
-- Looking for shmat - found
-- Looking for IceConnectionNumber in ICE
-- Looking for IceConnectionNumber in ICE - found
-- Configuring done
-- Generating done
-- Build files have been written to: /home/hehao/peridyno-gitee/build
- make项目,其中 -j8 表示使用8个线程同时编译,加快编译速度:
$ make -j8
hehao@hehao:~/peridyno-gitee/build$ make -j8
[  1%] Automatic MOC for target nodes
[  2%] Built target glad
[  6%] Built target glfw
[  9%] Built target Core
[  9%] Built target nodes_autogen
[ 11%] Built target imgui
[ 21%] Built target nodes
[ 44%] Built target Framework
[ 46%] Built target RenderCore
[ 50%] Built target IO
[ 52%] Built target ImWidgets
[ 54%] Built target Volume
[ 56%] Built target RigidBody
[ 63%] Built target GLRenderEngine
[ 63%] Automatic MOC and UIC for target QtGUI
[ 64%] Built target GlfwGUI
[ 66%] Built target Interaction
[ 70%] Built target Modeling
[ 70%] Built target QtGUI_autogen
[ 75%] Built target ParticleSystem
[ 75%] Built target GL_GlfwGUI
[ 76%] Built target GL_InstanceVisualizer
[ 78%] Built target GL_SegmentVisualizer
[ 78%] Built target GL_MouseInteractionInGraphicsPipeline
[ 78%] Built target GL_MouseInteraction
[ 78%] Built target GL_Topology
[ 80%] Built target HeightField
[ 84%] Built target Peridynamics
[ 97%] Built target QtGUI
[ 99%] Built target Qt_Bricks
[ 99%] Built target Qt_MarchingCubes
[ 99%] Built target Qt_ShowChinese
[ 99%] Built target Qt_Pickers
[ 99%] Built target Qt_GUI_Empty
[100%] Built target Qt_MouseInteractionInGraphicsPipeline
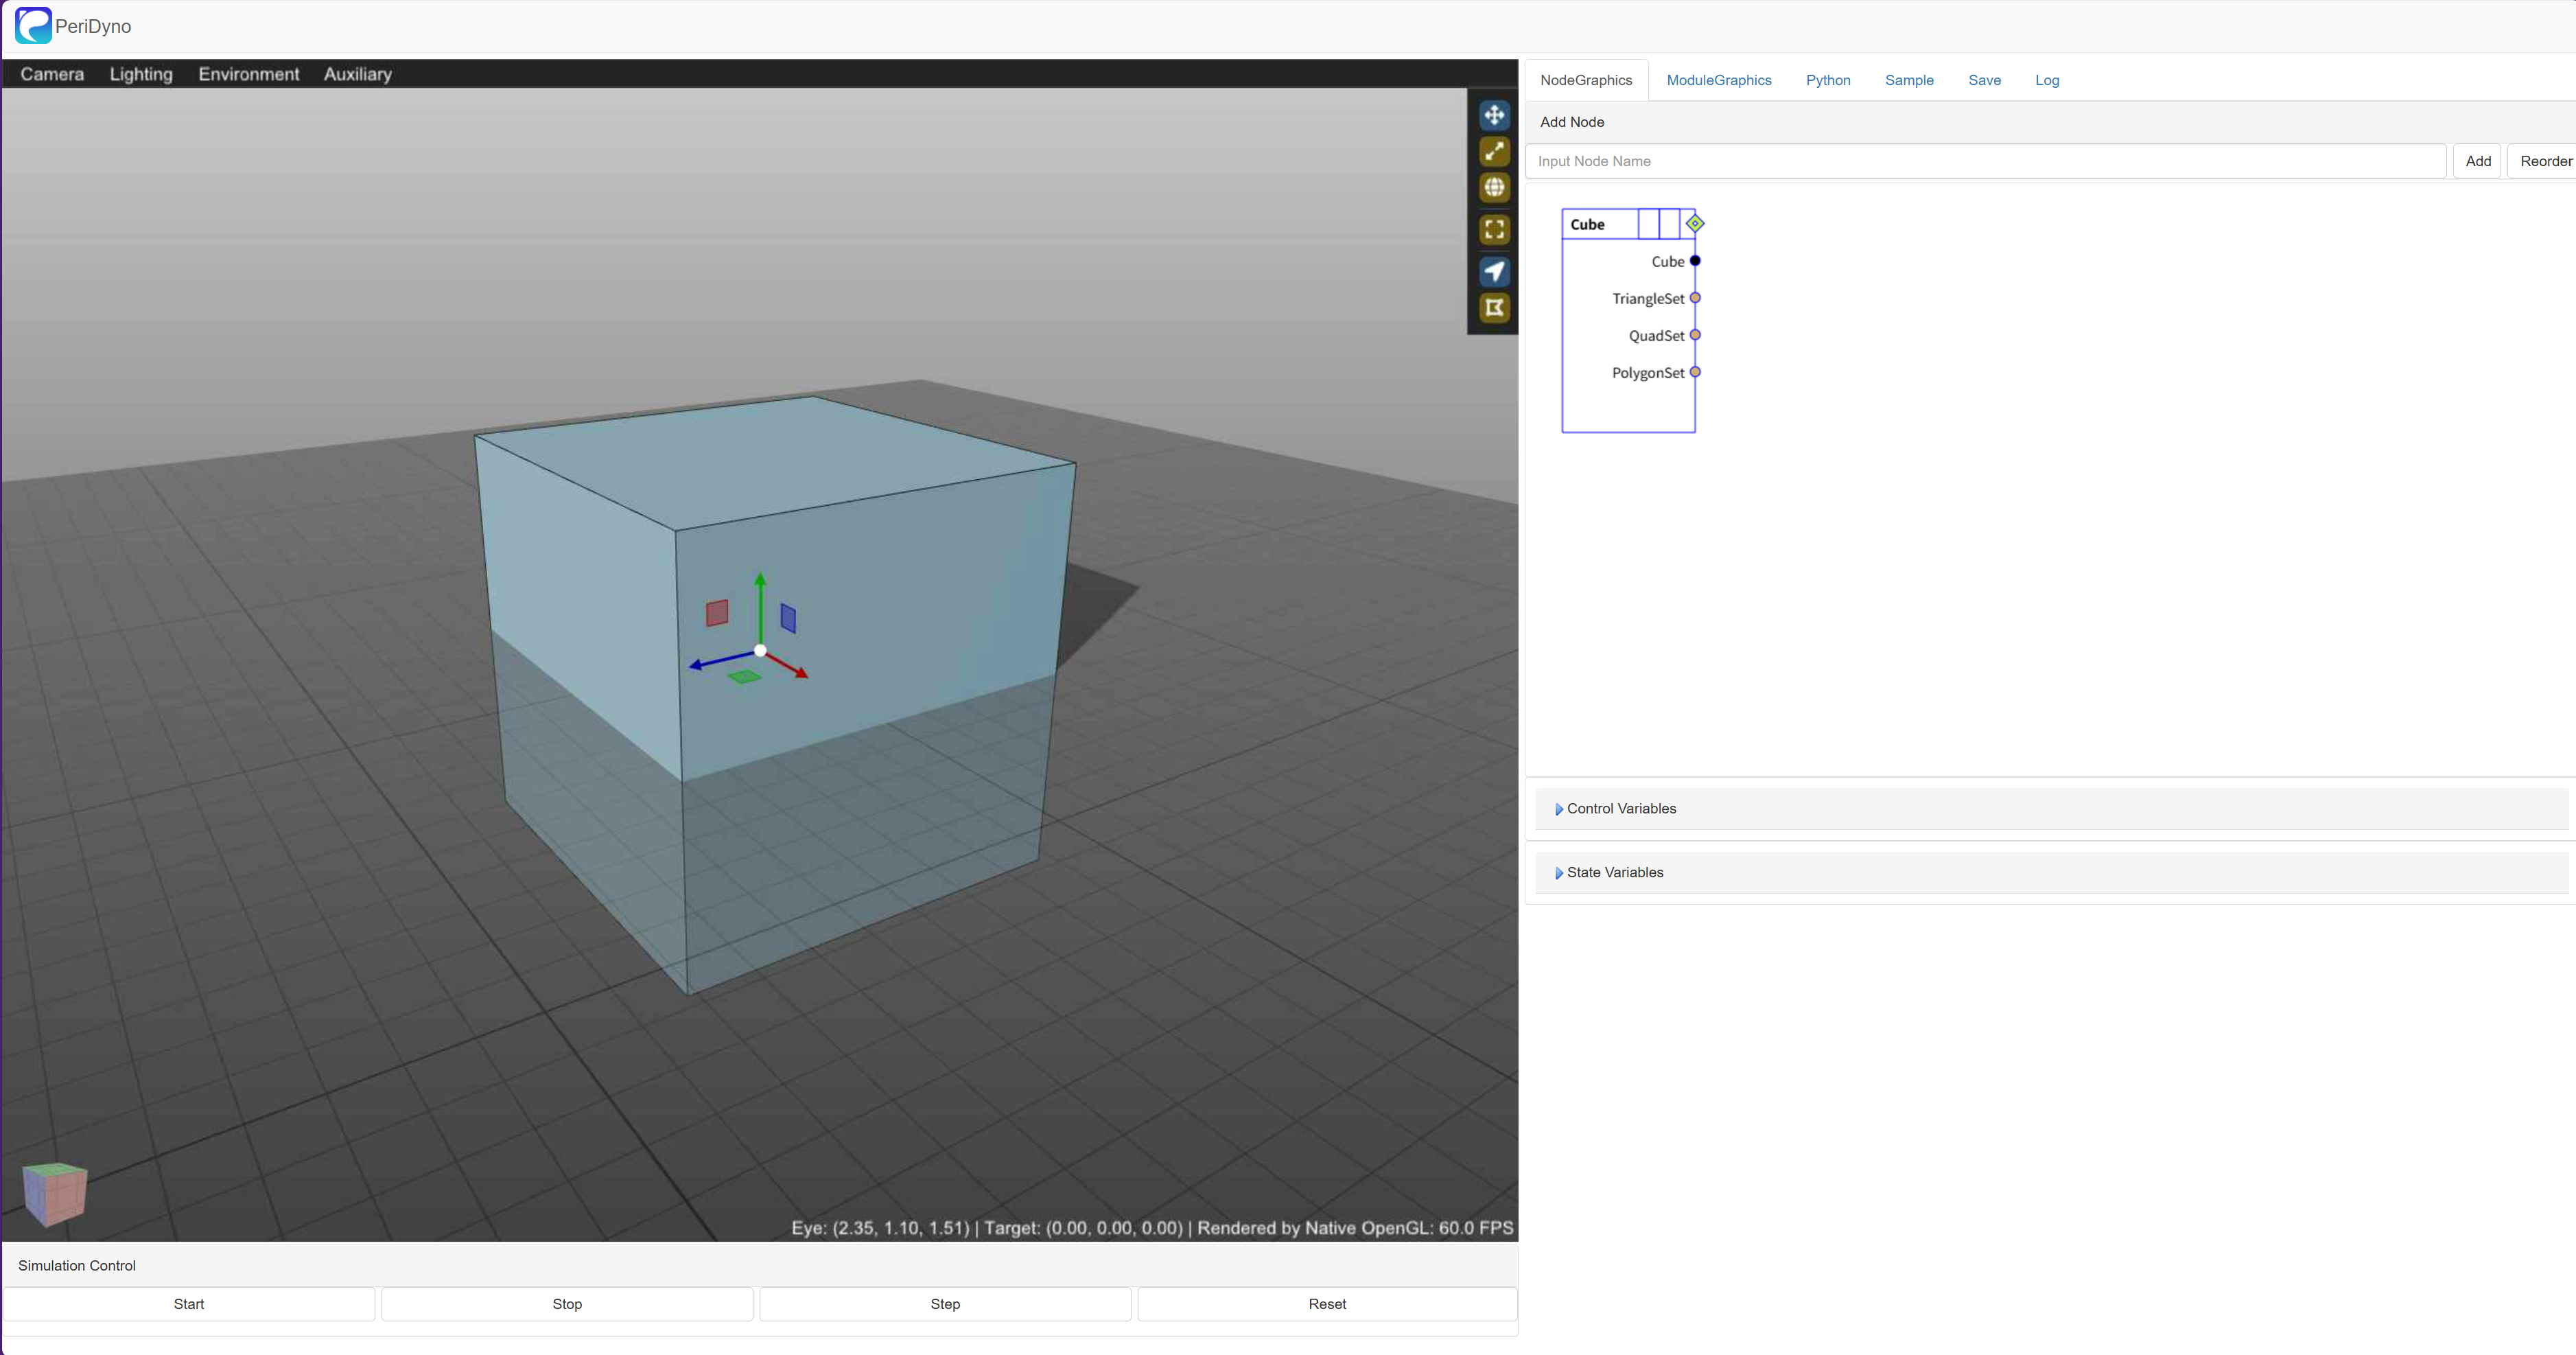
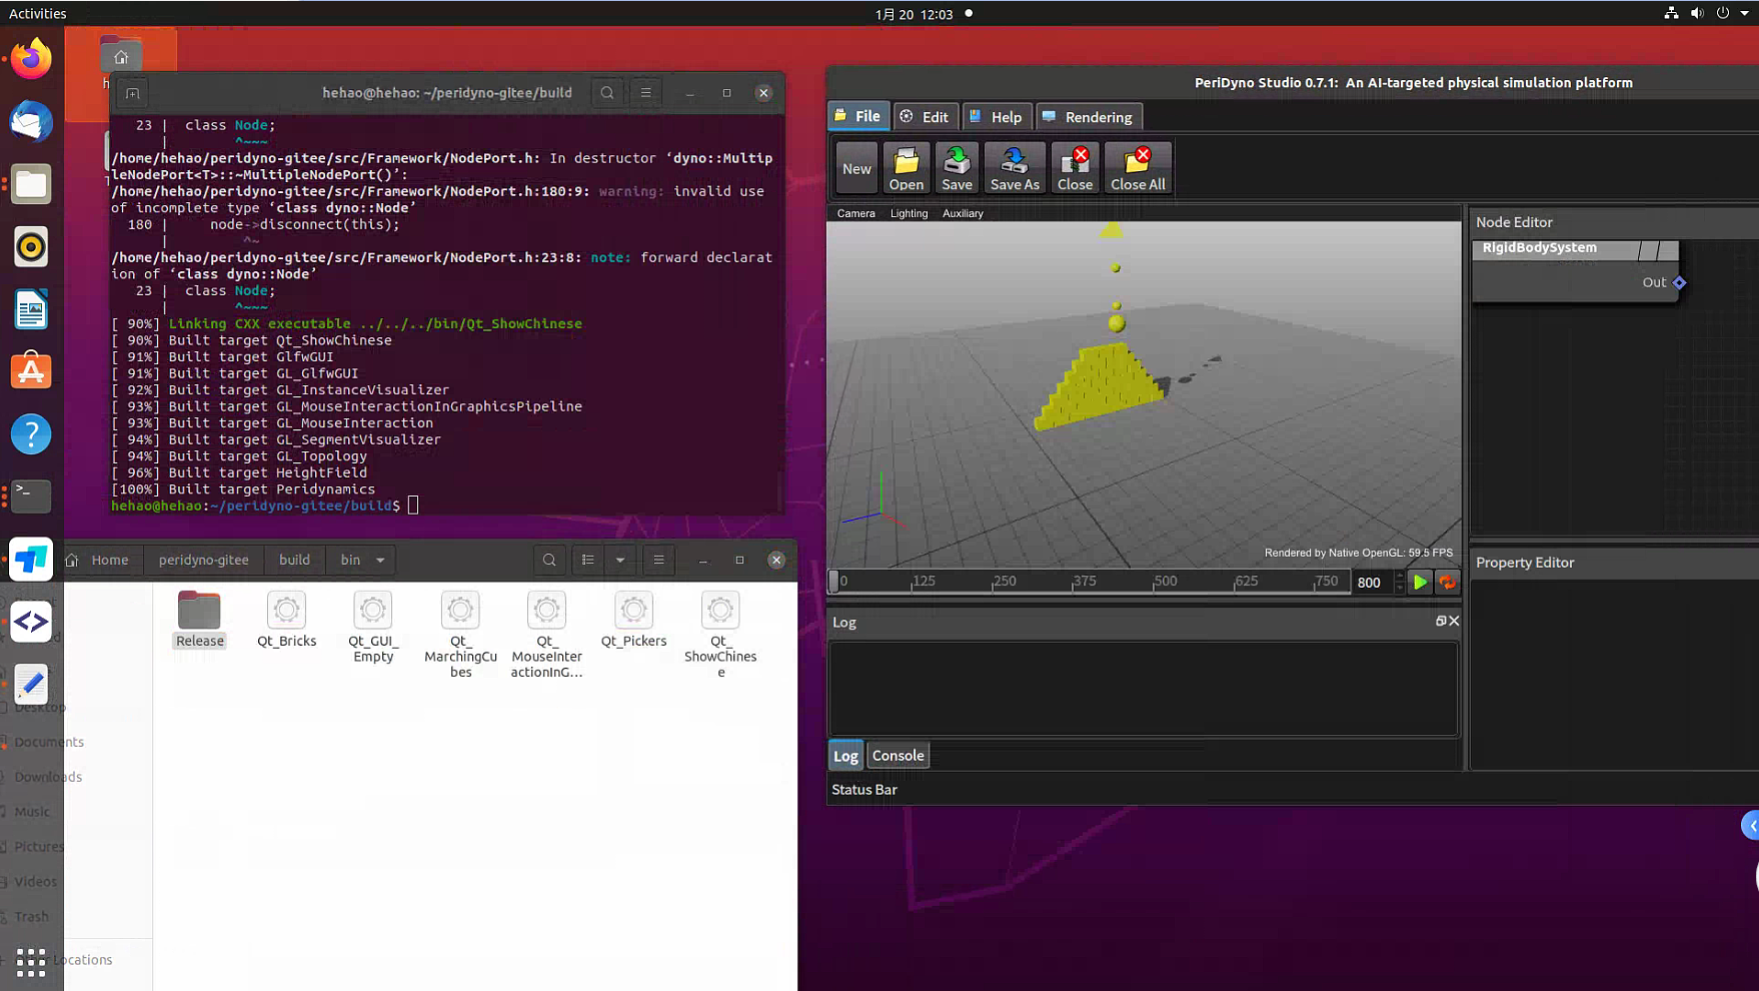
- 运行效果如下:
8、安装网页端Wt框架(可选)
可安装网页端Wt框架服务端,适用于无头服务器环境。
- 安装Wt组件
Wt组件在linux端需要编译安装。可参看https://redmine.emweb.be/projects/wt/wiki/Installing_Wt_on_Ubuntu进行安装。
安装uuid用于Wt的组件ID生成。
$ sudo apt install uuid uuid-dev
- 安装pybind11
pybind11用于执行WtGUI中的python解释器和样例功能。
& pip install pybind11
- cmake重新生成
参数 -DPERIDYNO_WT_GUI:BOOL=ON 表示编译PeriDyno的Wt库,参数 -DPERIDYNO_PYTHON_BINDING:BOOL=ON 表示编译PyPeridyno库。
- 编译运行
编译完成后执行WtGUI样例:
$ cd bin/Release
$ ./Wt_EmptyGUI
运行后浏览器打开http://localhost:5000/查看。
效果如下: